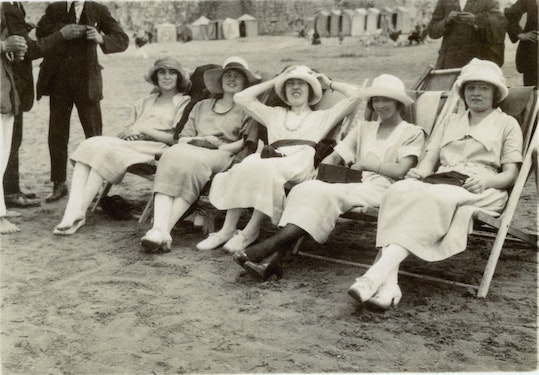
In the ever-evolving world of photography and digital art, classic styles are often revived to infuse a sense of nostalgia and charm into modern creations. One such timeless effect is the sepia filter, which imparts a warm, brownish tone to images, reminiscent of old-fashioned photographs. In this blog post, we’ll delve into the magic of the sepia filter photoshop and explore how you can use it to add a touch of vintage elegance to your pictures.
1. The Allure of Sepia: A Glimpse into the Past
Before diving into the technical details, let’s take a moment to appreciate the beauty of sepia-toned photographs. Sepia is more than just a color; it carries with it a sense of history and emotion. Originating from the ink sac of the common cuttlefish, sepia ink was historically used to write and draw, leading to the association of the term with aged manuscripts. Over time, this brownish tint became a signature of antique photographs, sparking a trend that persists even in today’s digital age.
2. Opening the Doors to Photoshop’s Creative Haven
Step into the realm of digital manipulation with Adobe Photoshop, the go-to tool for photographers, designers, and artists. With its extensive array of filters and effects, Photoshop empowers you to transform ordinary pictures into stunning masterpieces. Among the many options, the sepia filter stands out as a bridge between past and present, invoking a sense of timelessness.
3. Embracing the Sepia Transformation: A Step-by-Step Guide
Let’s roll up our sleeves and get down to the practical aspects of applying the sepia filter to your photos in Photoshop:
Step 1: Select Your Image Open Photoshop and import the image you want to work on. This could be a portrait, a landscape, or any photo that holds significance to you.
Step 2: Duplicate the Layer Always work on a duplicate layer to preserve the original image. Right-click on your image layer and choose “Duplicate Layer.”
Step 3: Apply the Sepia Filter With the duplicated layer selected, navigate to ‘Image’ > ‘Adjustments’ > ‘Photo Filter.’ A dialogue box will appear, presenting you with various filter options. Choose the sepia filter and adjust the density to achieve your desired effect. The preview window allows you to fine-tune the settings.
Step 4: Blending Options (Optional) For added depth and authenticity, experiment with blending options. Change the layer blending mode to ‘Overlay’ or ‘Soft Light’ to integrate the sepia tones more organically with the original image.
Step 5: Finishing Touches Don’t hesitate to explore further adjustments like contrast, brightness, and vignettes to perfect the overall atmosphere. Remember, the goal is not just to apply a filter but to create a harmonious composition.
4. The Art of Selective Coloring: A Twist on Tradition
While sepia filters often evoke a sense of mono-chromatic nostalgia, combining them with selective coloring can produce intriguing results. This technique involves retaining a hint of color in specific areas while desaturating the rest. This creates a focal point and enhances the storytelling aspect of your image.
5. Breathing Life into Black and White: Sepia Toning in Monochrome
Another creative avenue to explore is combining the sepia filter with black and white photography. By toning a monochrome image with sepia, you infuse it with a subtle warmth that brings out textures and details, making it more visually captivating.
6. Preserving Modern Moments with a Vintage Twist
In a world dominated by high-definition visuals, it’s fascinating to see how the sepia filter can introduce an element of sentimentality. Applying this technique to contemporary scenes or portraits allows us to reimagine modern moments through an antique lens, underscoring the enduring relevance of classic aesthetics.


